You’ve done your research, subscribed to a VPN service, and clicked that big, satisfying “Connect” button. You feel a sense of digital security wash over you. But here’s a question that might keep you up at night: Is your digital invisibility cloak actually working, or is it full of holes?
Simply seeing “Connected” in your VPN app isn’t a guarantee of total protection. Your connection could be “leaking” your real data, exposing your IP address, Browse activity, or location to your Internet Service Provider (ISP), websites, and potential snoopers.
Don’t worry. You don’t need to be a cybersecurity expert to verify your connection. This guide will walk you through exactly how to check if your VPN is working properly. We’ll cover simple, 60-second checks and more advanced tests to ensure your privacy is locked down tight.
Table of Contents
The Foundation: Why You Need to Check Your VPN
A VPN, or Virtual Private Network, works by creating an encrypted “tunnel” for your internet traffic. It routes your data through a remote server, masking your real IP address with its own. This should make your online activities private and secure.
However, things can go wrong:
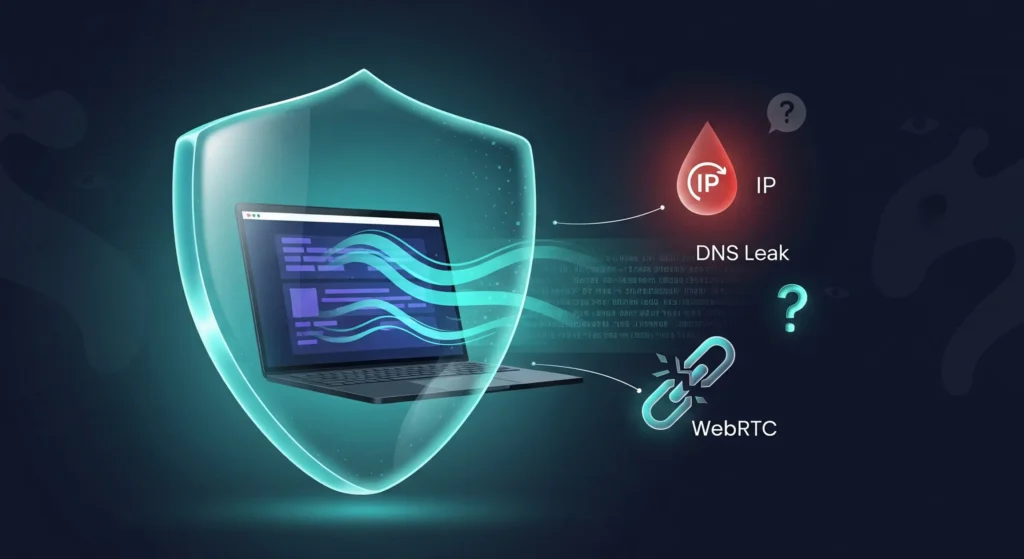
- IP Leaks: Your true IP address can be exposed, defeating the main purpose of the VPN.
- DNS Leaks: Your Browse requests might still go through your ISP’s servers, allowing them to see which websites you visit.
- WebRTC Leaks: A common vulnerability in web browsers that can reveal your real IP address even with a VPN active.
- Dropped Connections: If your VPN disconnects without you realizing it, your traffic is instantly exposed.
Regularly performing the checks below ensures you’re getting the privacy you’re paying for.
Test 1: The Basic IP Address Check
This is the most fundamental test and the first thing you should always do. It confirms whether your IP address has been successfully changed to the VPN server’s IP.
What is an IP Address? Think of it as your home’s mailing address, but for the internet. It’s a unique number that identifies your device and its location.
How to Check Your IP Address:
- Find Your Real IP: Make sure your VPN is disconnected. Open your web browser and go to a trusted IP-checking website like ismyvpnworking.online . Note down the IP address and the location it shows. This is your real, public IP address provided by your ISP.
- Connect Your VPN: Open your VPN application and connect to a server in any country you choose. For a clear result, pick a country different from your own. For example, if you’re in India, connect to a server in the United States.
- Check Your New IP: Return to the same IP-checking website and refresh the page.
The Verdict:
- Success: The website should now show a completely different IP address and a location that matches your chosen VPN server (e.g., Los Angeles, USA).
- Failure: If you still see your original IP address and location, your VPN is not working at all. You should try reconnecting or contacting your VPN provider’s support.
(Suggested AdSense Break)
Test 2: The Critical DNS Leak Test
This test is arguably even more important than the basic IP check. Even if your IP is hidden, a DNS leak can still expose your Browse habits.
What is a DNS Leak? The Domain Name System (DNS) is like the internet’s phonebook. When you type “https://www.google.com/search?q=google.com” into your browser, a DNS server translates that into a computer-friendly IP address. Normally, these requests go to your ISP’s DNS servers. A good VPN should route these requests through its own anonymous DNS servers inside the encrypted tunnel. A DNS leak happens when these requests “leak” out of the tunnel and go to your ISP’s servers, allowing them to log every site you visit.
How to Perform a DNS Leak Test:
- Ensure your VPN is connected.
- Go to a specialized testing site like DNSLeakTest.com.
- The site will likely show your apparent location based on your VPN. Click on the “Standard Test” or “Extended Test” button.
- The test will run and then display a list of the IP addresses and owners of the DNS servers it detected.
The Verdict:
- Success: The results should show DNS servers that belong to your VPN provider or a neutral third party (like Google or Cloudflare, if your VPN uses them). The locations should match your VPN server’s location.
- Failure: If you see the name of your own Internet Service Provider (e.g., Comcast, Verizon, BT, Jio) in the results, you have a DNS leak.
Test 3: The Sneaky WebRTC Leak Test
WebRTC (Web Real-Time Communication) is a technology built into most modern browsers (like Chrome, Firefox, and Edge) that allows for direct peer-to-peer communication, like voice and video calls, right from the browser. It’s useful, but it has a nasty side effect: it can broadcast your real IP address, completely bypassing the VPN.
How to Perform a WebRTC Leak Test:
- With your VPN connected, visit a testing page that specifically checks for WebRTC leaks. A great all-in-one option is BrowserLeaks.com/webrtc or the aforementioned ipleak.net (it checks everything).
- Look at the “WebRTC IP Address Detection” section.
The Verdict:
- Success: The test should show “No leak” or only display the public IP address of your VPN server.
- Failure: If you see your real public IP address listed under any of the WebRTC sections, you have a leak.
How to Fix a WebRTC Leak:
Fortunately, this is often fixable.
- In Your VPN App: Many premium VPNs have built-in WebRTC leak protection. Check the settings menu of your VPN client and make sure this feature is enabled.
- Browser Extensions: Install an official browser extension from your VPN provider, which often helps manage these leaks. Alternatively, extensions like uBlock Origin have options to block WebRTC.
- Disable WebRTC in Your Browser: This is a more advanced option, but you can disable it in the advanced settings of browsers like Firefox. (Search for
about:configand setmedia.peerconnection.enabledtofalse).
(Suggested AdSense Break)
Test 4: Checking for Other Red Flags
Beyond leaks, other performance issues can indicate your VPN isn’t working as it should.
Geo-Location Test
Are you using a VPN to watch streaming content from another country? This is the easiest way to test it.
- Connect your VPN to a server in the desired country (e.g., the UK).
- Try to access a region-locked service like BBC iPlayer.
- The Verdict: If you can access and stream the content, your VPN is successfully spoofing your location. If you get an error message saying the content is not available in your region, the service has detected your VPN.
Speed Test
While all VPNs will reduce your internet speed slightly due to encryption and distance, a massive drop is a problem.
- Use a site like Speedtest.net and run a test with your VPN disconnected. Note the download and upload speeds.
- Connect to a nearby VPN server and run the test again.
- The Verdict: A drop of 10-30% is normal. If your speed plummets by 80-90%, try switching to a different server or a different VPN protocol (like WireGuard instead of OpenVPN) in your app’s settings.
Test 5: The Kill Switch Test (The Safety Net)
A Kill Switch is a crucial feature that automatically blocks all internet access if your VPN connection drops unexpectedly. This prevents your real IP from being exposed in the moments before you realize you’ve been disconnected.
How to Test Your Kill Switch:
- Enable the Kill Switch in your VPN’s settings menu.
- Start a large download or have a webpage constantly refreshing.
- Manually force the VPN to disconnect. You can do this by:
- Using your computer’s firewall to block the VPN application.
- Force-quitting the VPN’s background process via Task Manager (Windows) or Activity Monitor (Mac).
- The Verdict:
- Success: Your internet connection should immediately drop. The download will stop, and the webpage won’t load. Your traffic is safe.
- Failure: If your internet continues to work on your regular connection, your Kill Switch is not functioning correctly.
What to Do If Your VPN Fails a Test
Found a leak? Don’t panic. Here’s your action plan:
- Enable Leak Protection: Dive into your VPN app’s settings. Look for options like “DNS Leak Protection,” “IPv6 Leak Protection,” and “WebRTC Leak Protection” and make sure they are all turned on.
- Turn on the Kill Switch: This should be non-negotiable. Always have it enabled.
- Switch Servers or Protocols: The server you’re using might be misconfigured. Try connecting to a different server. You can also try switching protocols (e.g., from IKEv2 to OpenVPN or WireGuard) in the settings.
- Contact Support: Your VPN provider’s customer support team can help you troubleshoot specific issues with their software.
- Consider a Better VPN: If you’re using a free VPN or one with a poor reputation, leaks are common. These services often lack the advanced features and robust infrastructure needed for real privacy. It might be time to upgrade to a reputable, paid service. (Internal Link: See our guide to the Best VPNs of 2025).
Conclusion: Stay Vigilant, Stay Secure
Checking if your VPN is working isn’t a one-time task. It’s good practice to run these quick tests periodically, especially after a software update or if you’re about to engage in a sensitive online activity.
By taking a few minutes to verify your IP address, test for DNS and WebRTC leaks, and ensure your Kill Switch is active, you can browse with true confidence, knowing that your digital shield is holding strong.